
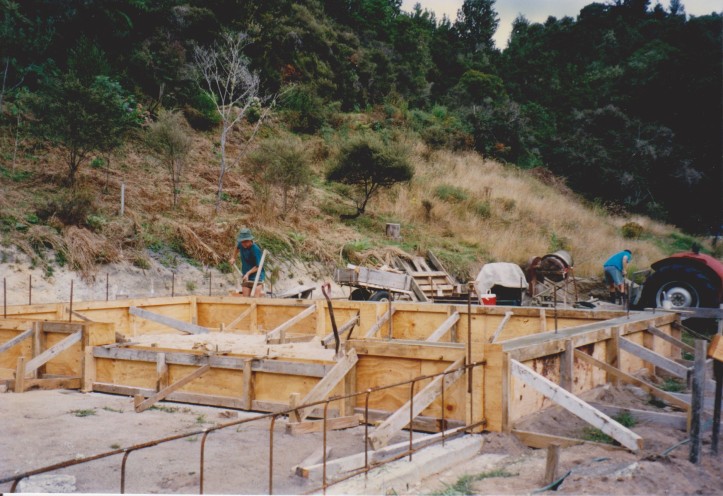
A log house grows from the ground up, a bit like a tree. The first step was to dig the foundations and it could have ended there. We measured and squared and squared and measured and measured and ….. you get the picture. I lost count of the number of times The Man of the House had me on the end of a tape measure but that house is so square; perfection takes time.
Reinforcing rods were concreted into the footings and then the boxing went up for the foundations. Family helped make and pour the concrete.
With the foundations done, the base logs were chosen. Have I mentioned how fussy The Man of the House is? He took a long time to choose just the right log, not just the first time but for every log on the house. Just the right length, just the right taper, just the right straightness and even just the right colour and texture. Mind you, I’m not complaining. That house is a work of art. None of your ‘near enough is good enough’ for this builder.

After cleaning and draw knifing, the log had to be split in half lengthwise with a chainsaw mill. Notches were cut at each end and in the centre with a chainsaw, sanded smooth and treated, and finally holes were drilled for the foundation rods to fit into. Steel rods tie all the logs together and to the foundations to stop any lateral movement.


And then the moment of truth. Would the holes be in the right place? The log was lifted and slowly lowered onto the foundation wall. It dropped neatly into place, every rod slipping into its corresponding hole without hesitation. As if there was any doubt. High fives all round.
The house slowly grew and so did our family. Our Darling Girl arrived later in the year that building started and learnt to sleep to a chainsaw lullaby. She cut her teeth on sawdust and more than once, I had to talk her down from the crane’s boom. She was a climber; trees, banks, the walls of our house and the crane, the higher the better and exponentially shortened her mother’s life in the process, I think.

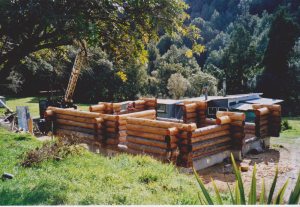
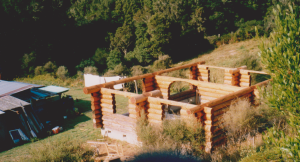

It took about two years to get this far. The log work is incredibly labour intensive;
1 – choose the right log
2 – debark the log
3 – draw knife the cambium layer off
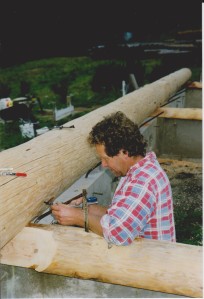
4 – lift it on top of the log it’s going to sit on and scribe the bottom of it to match the top of the log underneath to make a tight fit
5 – take the log down and cut the long groove, the length of the log along the scribed line, with a chainsaw and sand smooth
6 – lift the log back on and scribe the end notches
7 – take it down and cut the notches, then sand smooth
8 – treat the log with oil based fungicide and insecticide
9 – fit bitumen infused foam into the long groove to keep out rain and draughts
10 – put log into place. If it fits first time, woohoo. If not, take it off and adjust till it does.

It took at least a whole weekend to get a log on and there were many things that got in the way. We couldn’t get a log done if it rained or if we had farm work to do and every now and then we had a weekend off. Once the log work was finished, we had to put the roof on and put in windows, doors and a floor. These things weren’t covered in the log building course so whenever we were faced with a task outside our expertise, I got a book out of the library. There was still a long way to go.

Wendy, I have been looking forward to reading about how you had your house built. Wonderful, now if we were only 20 years younger 🙂 We would have loved to have done this!!
LikeLike
Thanks Sue. Its amazing what you can do with the enthusiasm and energy of youth.
LikeLiked by 1 person
You are so right Wendy 🙂
LikeLiked by 1 person
Great to see how it all happened 🙂 Hard work does pay off
LikeLike
Thank you Sam. Hard work does pay off as you know and its the dream that keeps you going.
LikeLiked by 1 person
Wonderful and a labour of love.
I lived off the grid for 21 years…in a boat! 🙂
LikeLike
It is and hugely satisfying when you look back. Thanks for visiting. 🙂
LikeLiked by 1 person